

Permissions command (/permissions)
Section titled “Permissions command (/permissions)”Manage your fine-grained agent permission rules interactively within the TUI.
Overview
Section titled “Overview”Antigravity CLI uses a fine-grained permissions engine to secure your workstation. While you can configure these rules manually in your settings file, the /permissions command opens an interactive Permissions Manager TUI panel to view, add, edit, and delete rules live.
For details on how the permission engine works, supported actions, and manual configuration, refer to the conceptual Permissions guide.
Managing permissions interactively
Section titled “Managing permissions interactively”To open the Permissions Manager, follow these steps:
- Type
/permissionsin the prompt box. - Press Enter.
/permissionsNavigation and controls
Section titled “Navigation and controls”The Permissions Manager operates in three panels:
-
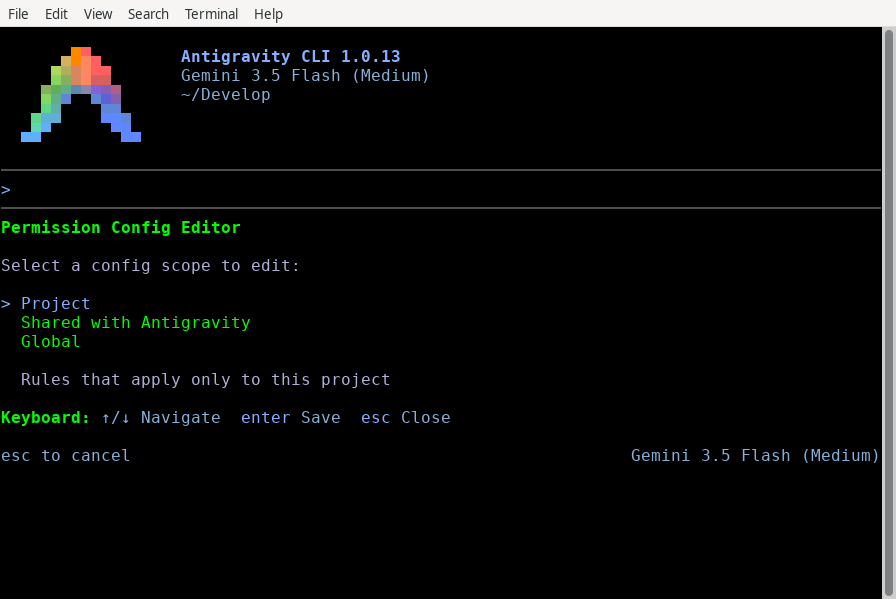
Scope picker: Select the configuration scope you want to edit:
- Project: Rules applying only to the active project (disabled if no project is open).
- Shared: Rules shared across all Antigravity products.
- Global: Global rules applying to all your sessions.
Use ↑/↓ (or J/K) to navigate, Enter to select, and Esc to exit.
-
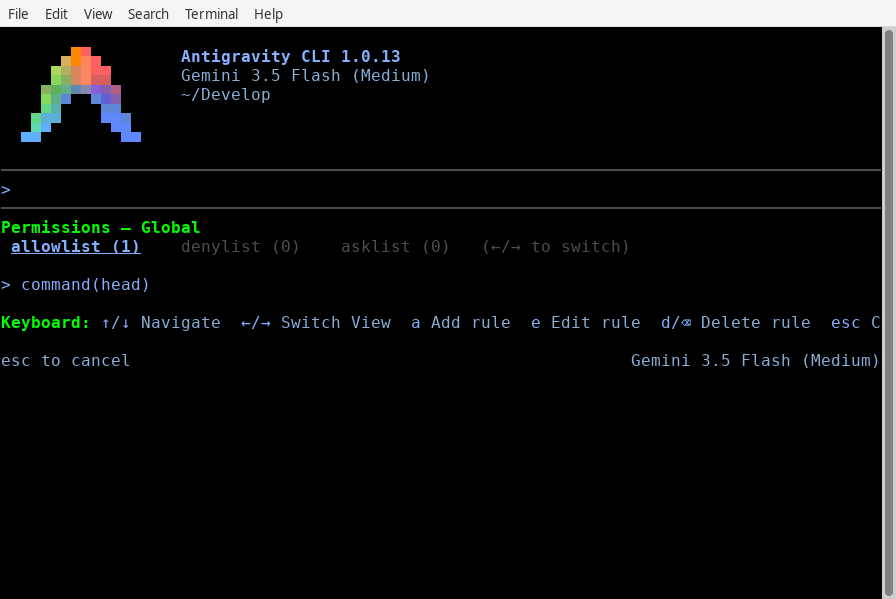
Rule viewer: View the rules configured for the selected scope:
- Switch between allowlist, denylist, and asklist tabs using ←/→ (or Tab).
- Scroll through the rules using ↑/↓ (or J/K).
- Press A to add a new rule.
- Press E (or Ctrl + G) to edit the highlighted rule.
- Press D (or Backspace) to delete the highlighted rule.
- Press Esc to return to the Scope Picker.
-
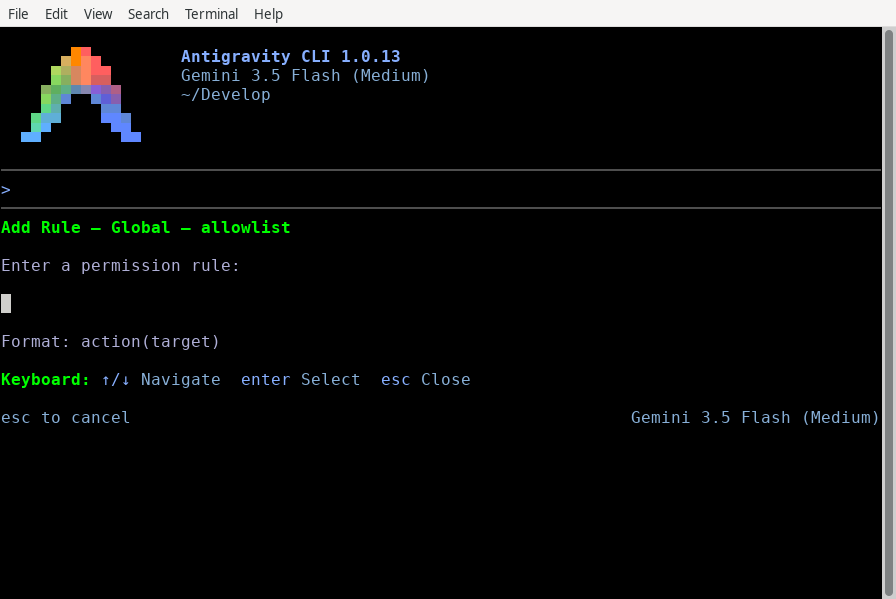
Add or edit rule: Type or edit a rule in the input field:
- Rules must follow the
action(target)format (for example,command(git)). - Press Enter to validate and save the rule.
- Press Esc to cancel.
- Rules must follow the
Step-by-step walkthrough
Section titled “Step-by-step walkthrough”Here is how to view, add, edit, and delete rules live in the TUI.
Selecting a scope and viewing rules
Section titled “Selecting a scope and viewing rules”When you run /permissions, you first open the Scope Picker. Select Global to manage your global rules:
Press Enter to open the Rule Viewer for the selected scope. You can use ←/→ to switch between the allow, deny, and ask tabs:
Adding a permission rule
Section titled “Adding a permission rule”To allow the agent to run git commands automatically without prompting, follow these steps:
-
In the Rule Viewer, press A. The Add Rule panel opens at the bottom:
-
Type
command(git)in the input field: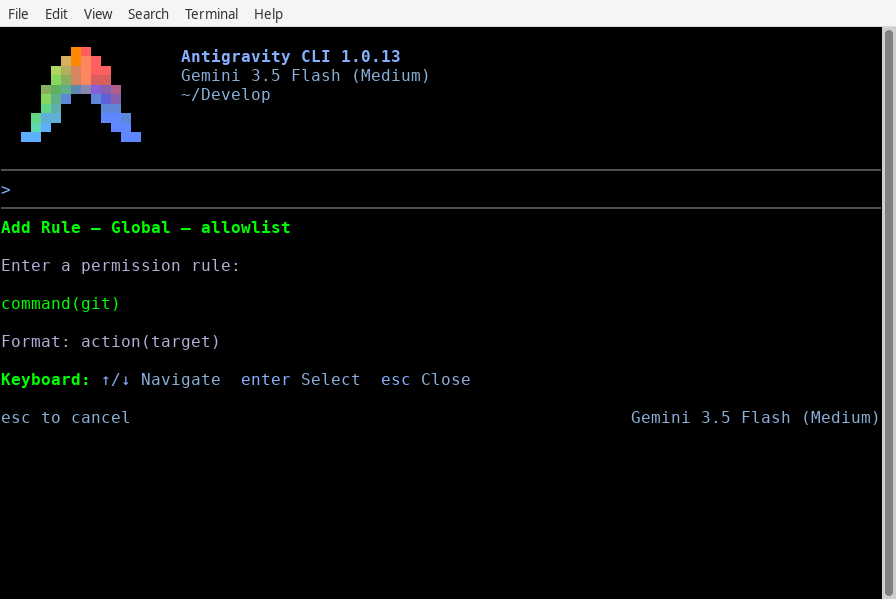
-
Press Enter. The rule is validated and saved, returning you to the Rule Viewer where
command(git)now appears in your allowlist: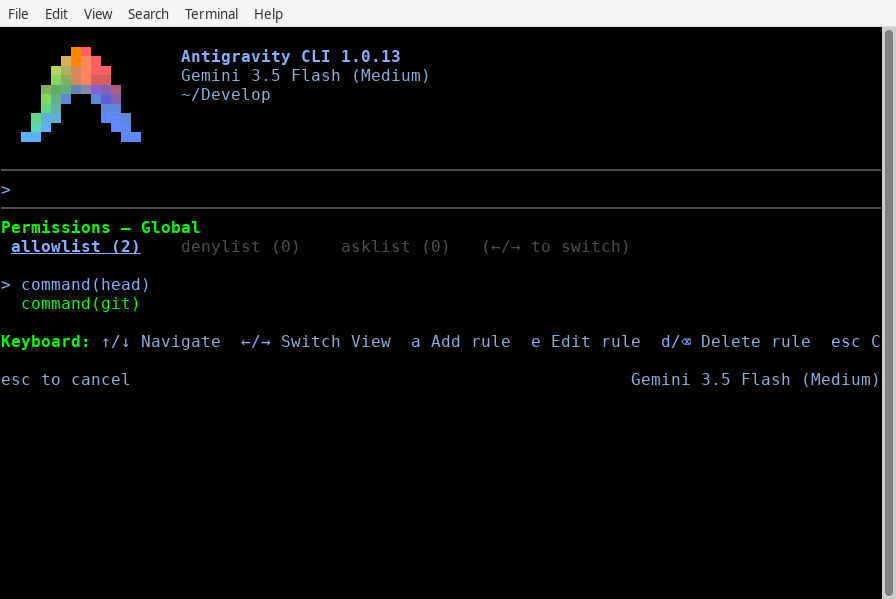
Editing a permission rule
Section titled “Editing a permission rule”If you want to restrict the agent so it can only run git diff automatically, you can edit the rule:
- In the Rule Viewer, use ↑/↓ to highlight
command(git). - Press E (or Ctrl + G). The input panel opens, prefilled with
command(git). - Modify the text to
command(git diff). - Press Enter to save. The new rule replaces the old one.
Deleting a permission rule
Section titled “Deleting a permission rule”To remove a rule and revert to prompting for those actions, follow these steps:
- In the Rule Viewer, highlight the rule you want to delete (for example,
command(git diff)). - Press D (or Backspace).
- The rule is immediately removed from the list.
Next steps
Section titled “Next steps”Explore the following guides to learn more about security and permissions:
- Permissions guide: Learn about the security model, action types, and wildcard matching.
- Sandbox and security: Configure the native OS container for running commands.
- CLI reference: View all available slash commands and keybindings.